
Introduction
About this Guide
This Guide provides detailed instructions on how to create good quality digital surrogates for archive material using the equipment available in the Heritage Hub. Equipment includes a Brother MFC-J6930DW Printer/Scanner and a Canon 6D Camera and rig. This guide does not include detailed set-up instructions for using the equipment. The equipment requires software to capture images. This guide does not include detailed instructions on how to install or set up the supporting software. If you require any guidance beyond the information in this document, please speak to a member of the Heritage Hub team.
Any images save to the ‘To Edit’ folder must be edited to a certain standard before being ‘archived’ in the cloud and made available on our website.
- Scanning:
This section explains how to use the Scanner in the Hub, which is a great tool for digitising smaller, flat documents. Using the Brother iPrint&Scan software, you can scan archive material and save files without any fuss; documents are automatically scanned at 600dpi as JPEG files and saved to the ‘To Edit’ folder on the Hub Mac, ready for processing. - Using the Canon 6D Camera:
This section explains how to use the Camera rig in the Hub which requires software on a separate device (computer, tablet or smartphone) used next to the rig to capture images. If you are using your own computer, you will need to install the EOS Utility 3 software. If you are using your own tablet or smartphone, you will need to install the Canon Camera Connect App. Any extra guidance for using the Canon 6D, such as pairing the camera with your computer, tablet or smartphone, can be found here: https://kenrockwell.com/canon/6d/users-guide/index.htm - Processing:
This section details all the steps you need to take after your digitised archive material is saved to the ‘To Edit’ folder on the Hub Mac. Processing includes naming image files, editing images using Adobe Photoshop on the Hub Mac and uploading them to the cloud where they are archived and stored permanently in our ODIN database as well as being made available to view on the BH website.
Definitions
- Archive material: Anything that is or contains a record
- Capture: The act of taking a scan or photograph of an item
- Digitisation: Removing material from the archive collection (can mean transfer to another repository, can mean selling the material or destroying it).
- Document: In this context, ‘document’ refers to a piece of archive material or a record that is not a 3D object. Documents can be digitised using the Scanner, unless they are larger than A3 size, in which case they must be photographed instead.
- Processing: All the steps necessary following capture that ensure an image is as good a digital version of a record as possible and it can be found when needed. This can involve editing an image, cropping and adjusting rotation, as well as naming and saving an image in the right place.
Why ‘digitise’?
Creating a digital version of a piece of archive material is not only a great way to make sure it can be accessed much more easily, but it also helps with preservation!
Being able to physically look at and handle collection items is an amazing experience but is only available to a limited audience who live nearby or can get to the village easily. By creating a digital collection, we can make our archives available online through our website. If even just a small part of our collections were accessible online, people from anywhere in the world can get a glimpse of some of the valuable records we hold. This can help people build on histories and stories about their family, ancestry, homes and places of birth and can be an incredible enhancement to learning for young people that would otherwise not be accessible.
Most non-digital kinds of records are already decaying by the time they are packaged and stored on an archive shelf. While parchment documents survive from the 10th century, clear and perfectly readable, they will not last forever and are always vulnerable to damp, dirt, pests and other environmental problems as well as disasters like fire or flood. Digital records, while sometimes vulnerable to their own digital forms of decay or disaster, can be copied, backed-up and preserved potentially forever. Digitisation is a quick and easy way of ensuring the longevity of access to most archival records.
Furthermore, creating digital versions of archive material held in the homes of our neighbours in Bishopsteignton allows us to have an expanded collection not limited by our physical storage space. It also means that we have access to records that would otherwise be totally unknown. Finally, those who own important village records can gain some peace of mind knowing that their precious collections are preserved in digital form.
What makes a good image?
When creating digital versions of archive material, it is important to always work to the same rules with each item. Working to a standard while digitising makes sure that we get the best possible digital version of every item we digitise. Because we have so many different types of archive material in the collection, ways of achieving the standard will vary from item to item. For example, if you are digitising a photographic print of a group of people, all the faces need to be clear enough for them to be recognisable. However, if you are digitising a page of a large book, the text needs to be readable. While we have some great digitisation equipment in the Hub, your images will always need editing to the best possible standard, even if it’s just quickly cropping a bit too much white space around the edges. Digitisation is all about creating a copy of an item that is as ‘true’ a surrogate of the original as possible at the same time as being as useful as possible for the purposes of our audience: family history research, house history research, and so on.
Bishopsteignton Heritage’s Standard for Digitisation
As ‘true’ a surrogate as possible means:
- The image(s) will show a ‘total’ view of the original archive material by recording both sides of a document or all faces of a 3D object.
- The images will include any margins, borders, mounts or other contextual material that is deemed to be part of the archival value of the individual item.
- The images will reflect an accurate reproduction of the colours and clarity of the original record, even where the original is damaged or, for example, a photograph is out of focus.
As useful as possible means:
- As far as possible, digitised photographs of people should show clear faces so that individuals can be identified.
- As far as possible, digitised texts should be clear so that individual letters can be identified, and the text can be read easily. Where texts, especially in manuscript (handwritten), are difficult to read, they should be digitally transcribed (see Transcription Guide).
While working towards these aims, it may be necessary to make sacrifices in one aspect so that another can be achieved. As long as you believe you have read through, understood and worked towards the Standard for Digitisation, you can’t go far wrong!
1 Scanning
This section explains how to use the Scanner in the Hub, which is a great tool for digitising smaller, flat documents. Using the Brother iPrint&Scan software, you can scan archive material and save files without any fuss; documents are automatically scanned at 600dpi as JPEG files and saved to the ‘To Edit’ folder on the Hub Mac, ready for processing.
1.1 Document Capture
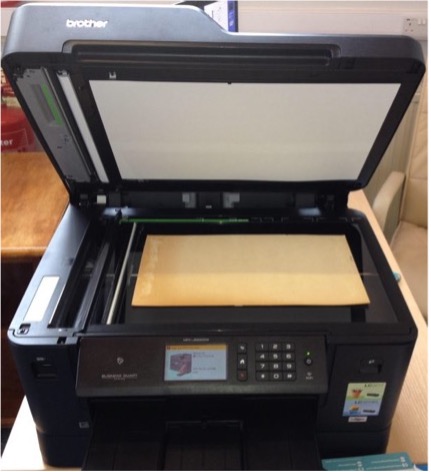
We use the Brother printer/scanner to digitise flat archive material, A3 size or smaller. To start, open the ‘Brother iPrint&Scan’ application on the Hub Mac.
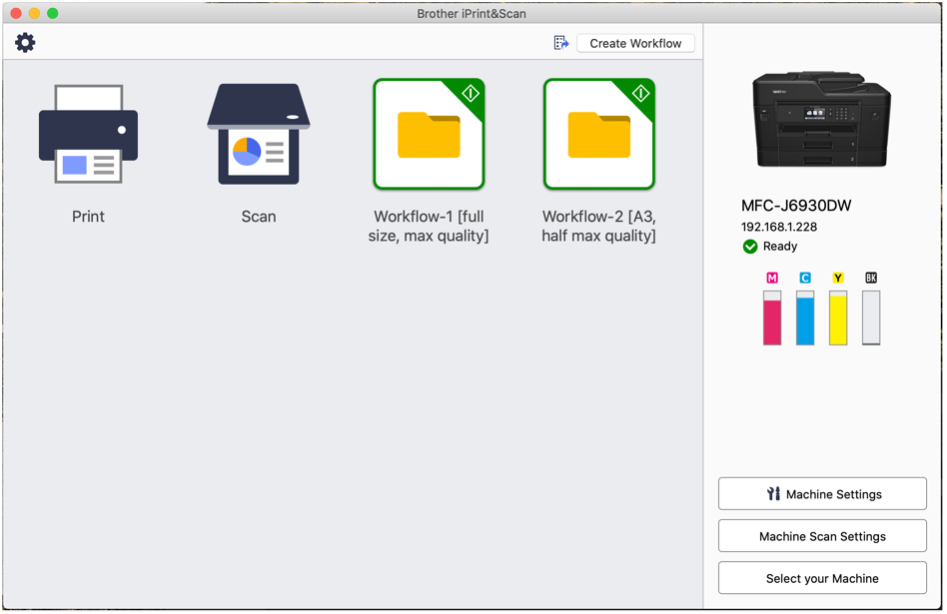
Brother iPrint&Scan application
- Carefully place the document you want to scan face-down on the scanning bed. Don’t worry about placing it perfectly straight, just make sure it is at least a centimetre away from the edges of the scanning bed.
- In the ‘Brother iPrint&Scan’ application, depending on the size and quality of what you are scanning, select either Workflow-1 [full size, maximum quality] or Workflow-2 [A3, half quality]. Either workflow will automatically scan the document and save it to the ‘To Edit’ folder.
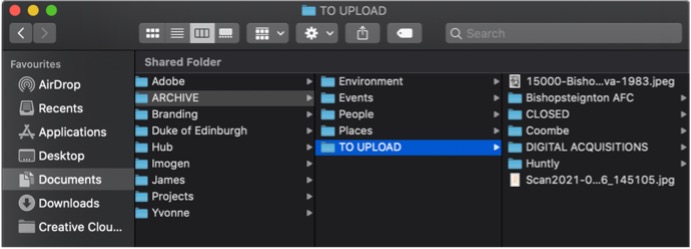
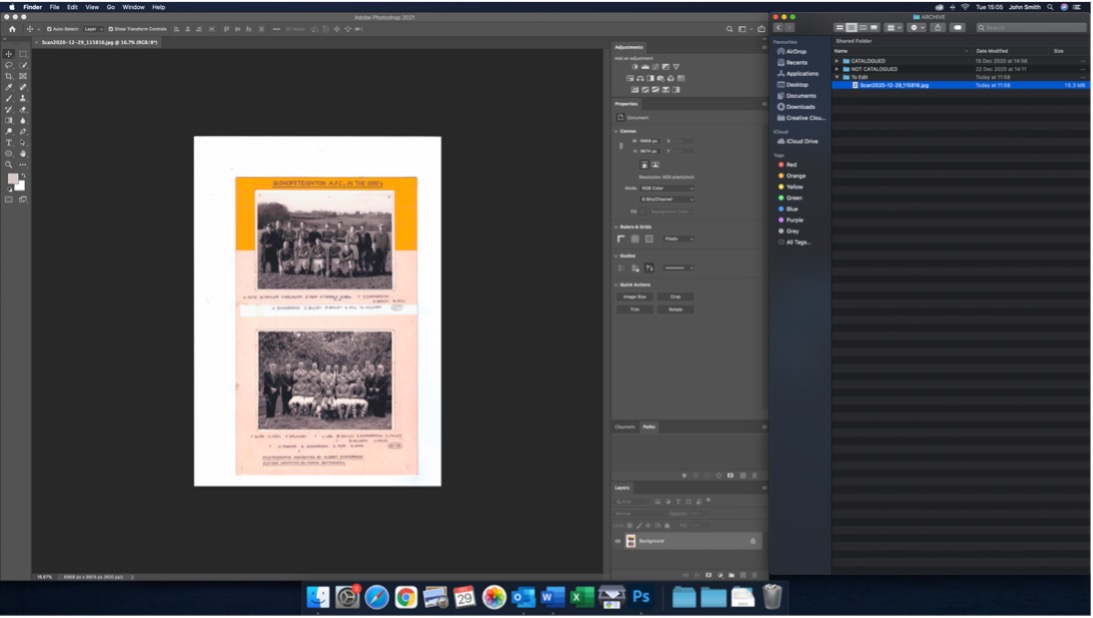
- You can access the scans for processing through the ‘Finder’ Application.

Finder application
2 Using the Canon 6D Camera
This section explains how to use the Camera rig in the Hub which requires software on a separate device (computer, tablet or smartphone) used next to the rig to capture images. If you are using your own computer, you will need to install the EOS Utility 3 software. If you are using your own tablet or smartphone, you will need to install the Canon Camera Connect App. Any extra guidance for using the Canon 6D, such as pairing the camera with your computer, tablet or smartphone, can be found here.
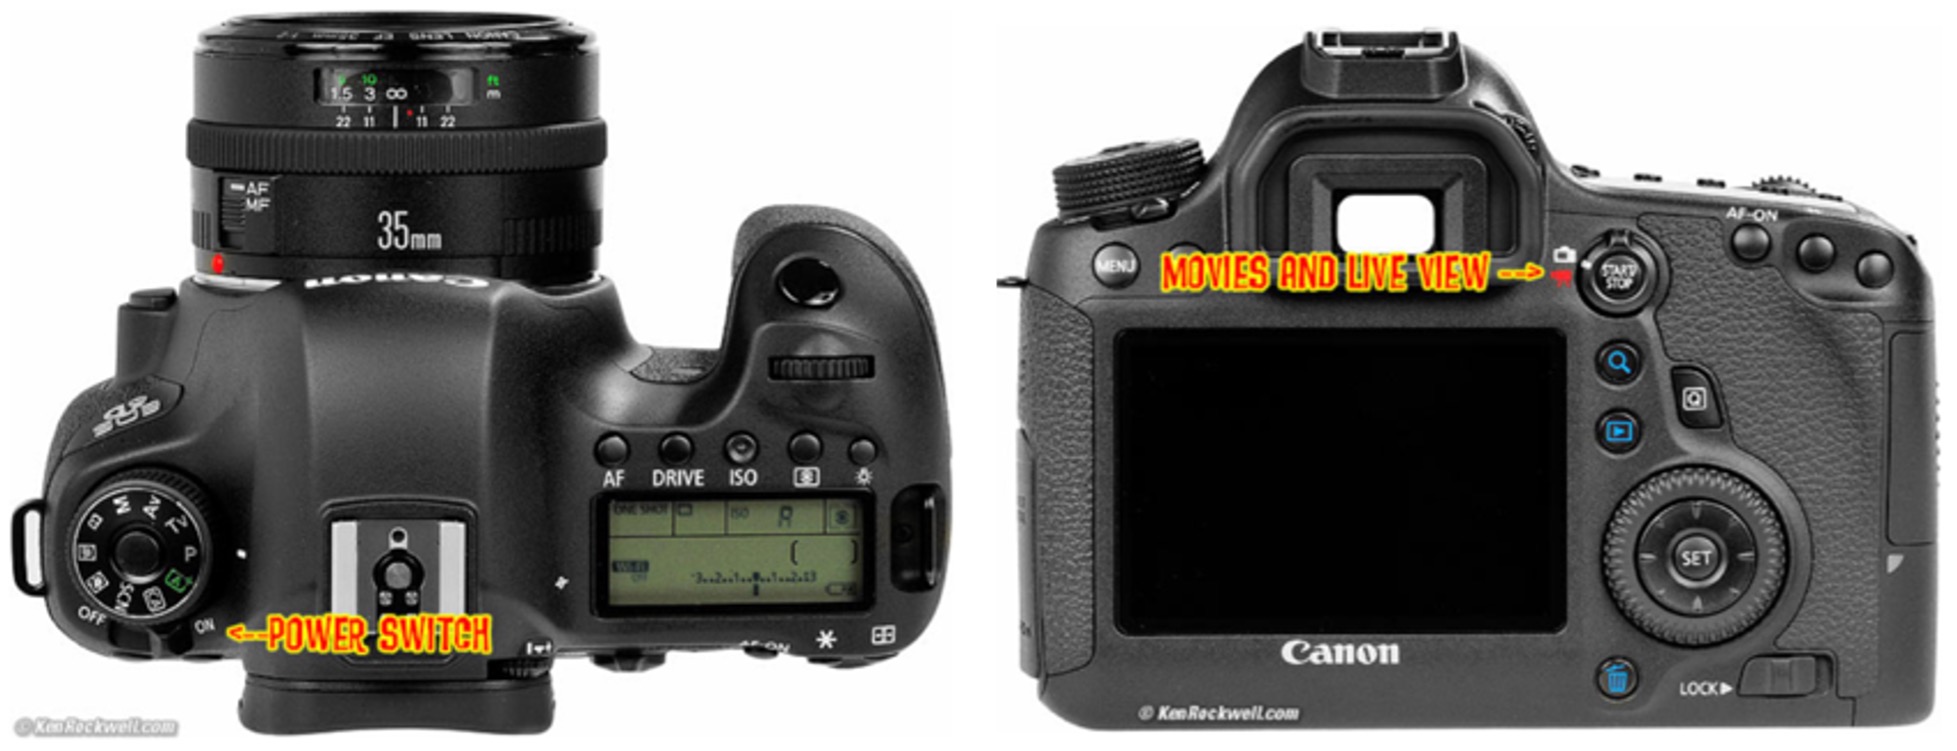
2.1 Setting-up
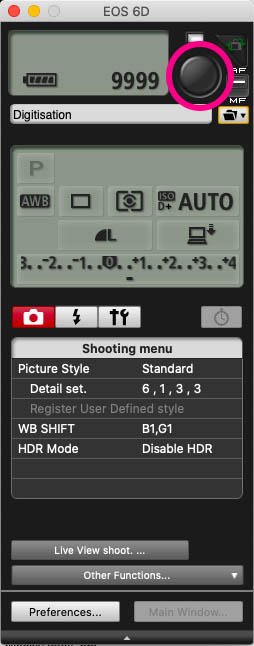
- Switch on the camera. If you are photographing a 3D object, you will need to use the tripod as well as the rig.
- You may need to press the ‘START/STOP’ button on the camera to open the shutter.
- Ensure the camera’s ‘Mode’ wheel is set to ‘P’ if you are photographing flat documents or 3D objects and switch on all 4 lights. If you are photographing a 3D object, you will need to move some or all of the lights from the table to the floor. Position the lights to eliminate as many shadows as possible.
- If you are photographing a document that is badly folded or curled, use one of the anti-reflective plastic sheets to keep it flat. This is also a useful method of copying for certain types of photographic prints that do not scan well:
Copied using scanner
Copied using Camera & anti-reflective sheet
- If you are photographing an object that has a mirrored, shiny or reflective surface, set it up inside the light tent. This will disperse the light, prevent most reflections and make for better images.
Photographed using the light tent

The light tent in use
- You will need to use the Mac computer to remotely control the camera. Open EOS Utility 3
- If the camera is on but EOS Utility 3 is not connected to it, you will see this Launcher screen
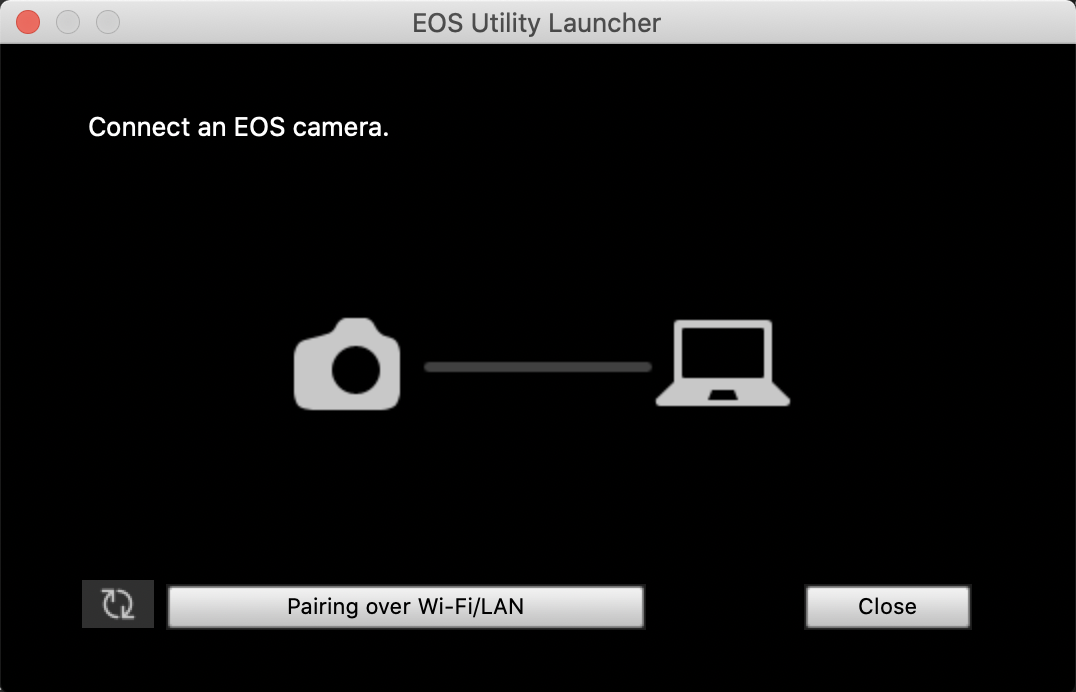
If after a few seconds the camera does not connect to the application, you will need to re-set the pairing. If you don't know how to pair the camera and the computer, seek assistance from colleagues.
- EOS Utility 3 should open this menu
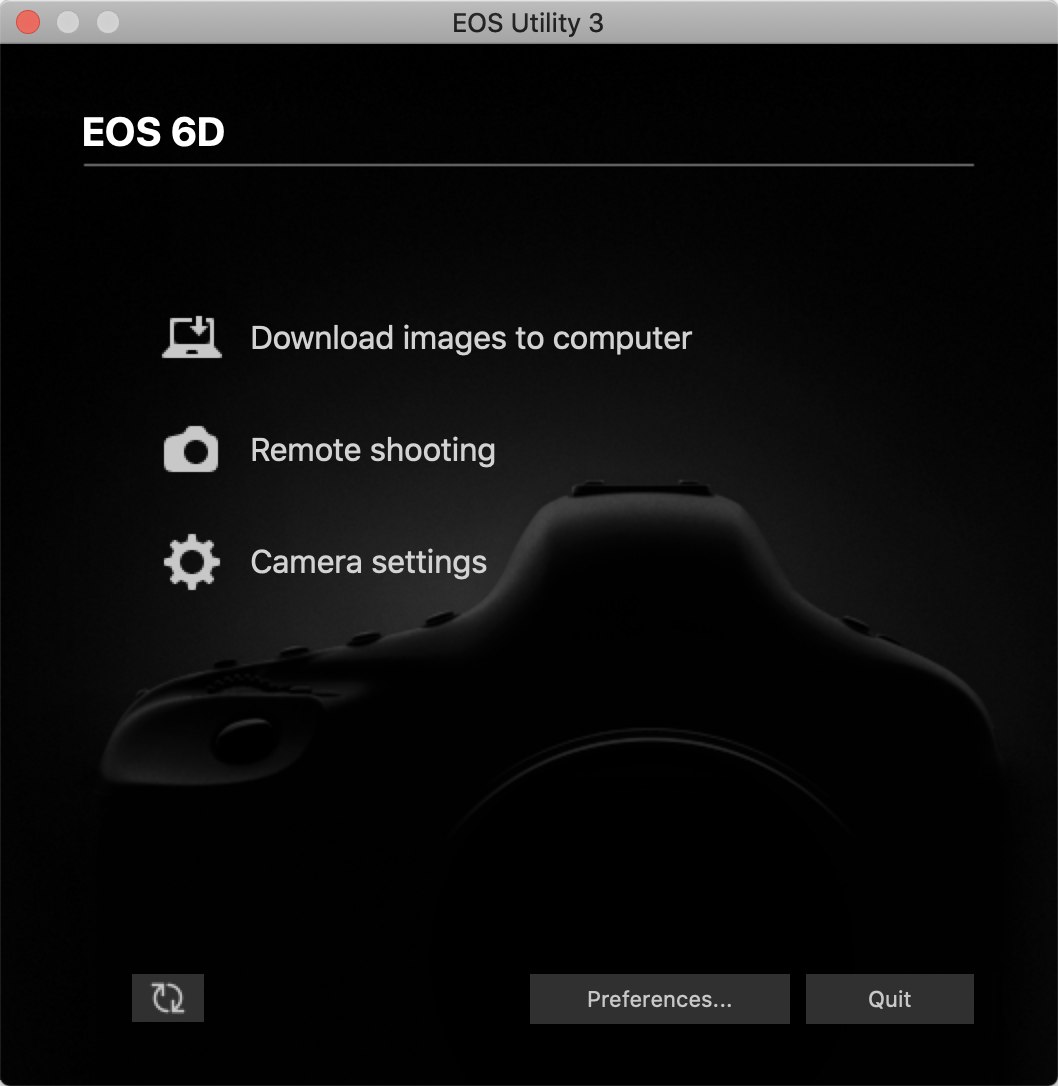
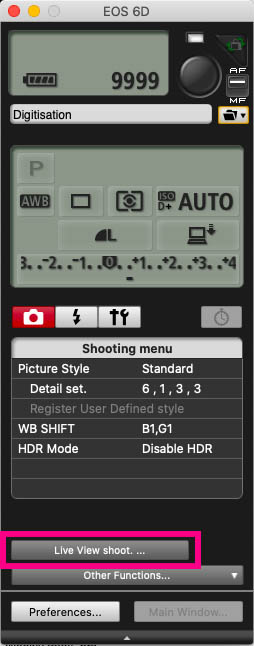 Click 'Remote shooting' to bring up a camera control panel, then select ‘Live view shoot’ to open the live view window so you can see what you are photographing.
- Using the live view, ensure the camera’s settings for exposure, white balance and so on are good. They will never be perfect so don’t spend hours adjusting, just get them looking ‘true’. White balance and exposure are often the ones that need changing especially if the light in the room has changed with cloudy or sunny weather.
- Take a test shot at the beginning of the day to make sure the camera settings are producing a good image and files are ending up in the right folder in the correct format. The first image you capture after opening the software will automatically open as a preview so you can check your settings
- Adjust the height of the camera on the rig/position on the tripod to make sure you are as close to the item as possible without cutting off any edges or photographing lots of blank space.
2.2 Capture
 When capturing images for the digitisation of archive material, always refer to the Standard for Digitisation on page 4 of this guide.
- The equipment we have available is versatile enough to achieve a good quality of digitisation for both flat documents and 3D objects.
- Remember to photograph both the front and back of documents where appropriate and capture all faces of a 3D object so that our audience can have as true and useful an impression of the material as possible.
- Hover over the circular shutter button until the camera has finished focusing. The camera will make a double-beep sound when it is ready. Now you can click the button and capture an image!
- The image will save to a pre-determined folder on the computer you are using. When you capture the first image of the day, a folder for today's date will be automatically created in ARCHIVE > TO UPLOAD > TO EDIT which you can find in the Finder application.
- You can see when the software has finished transferring the new image to its destination by monitoring the yellow progress bar under the shutter button.
- Allow the software to finish transferring the new image before you try to capture another.
Remember to put one of the 2 camera batteries and all 4 lamp batteries on charge when you are finished!
3 Processing
This section details all the steps you need to take after your digitised archive material is saved to the ‘To Edit’ folder on the Hub Mac. Processing includes editing images using Adobe Photoshop on the Hub Mac, naming image files, and uploading them to the cloud where they are archived and stored permanently in our ODIN database as well as being made available to view on the BH website.
3.1 Setting-up
- Begin by opening the first image in your batch of scans or photographs in the Adobe Photoshop application. You can make your workflow much quicker and easier by organising your applications neatly on the screen. Try this configuration:
- As long as you don’t already have an image open in Photoshop, you can drag and drop an image file from the Finder into Photoshop to create a new ‘project’ and begin editing.
3.2 Editing the image
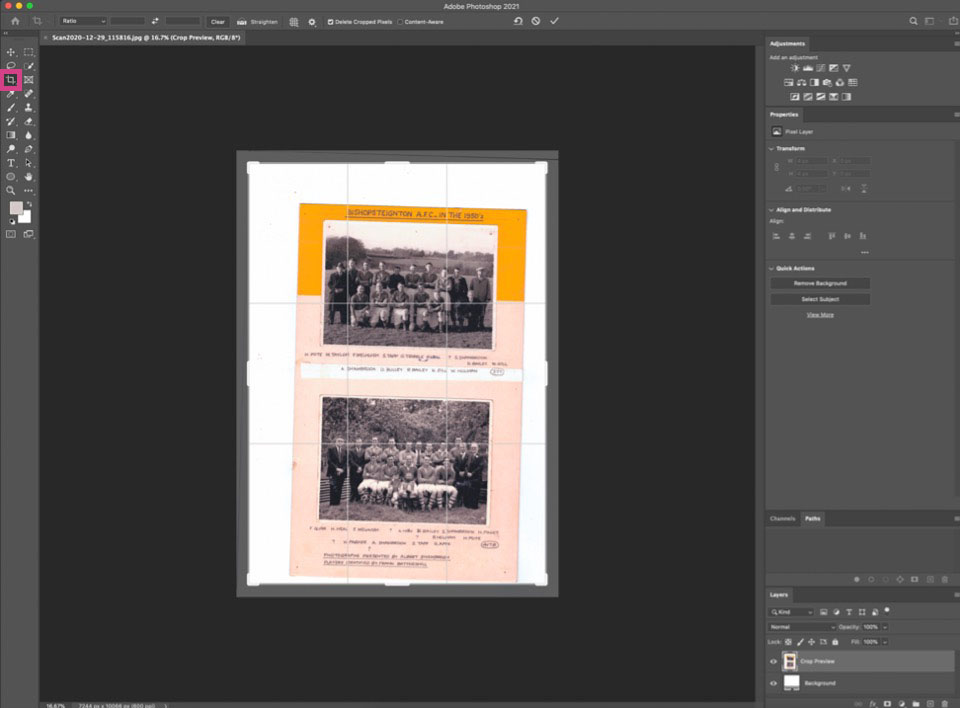
- If your image is not straight, use the ‘Crop tool’ in the left-hand toolbar and click and drag the image round to rotate it. Next, you can drag the white corner markers to crop the image. When you are done using the ‘Crop tool’, click the tick in the top toolbar or press the ‘Return’ key.
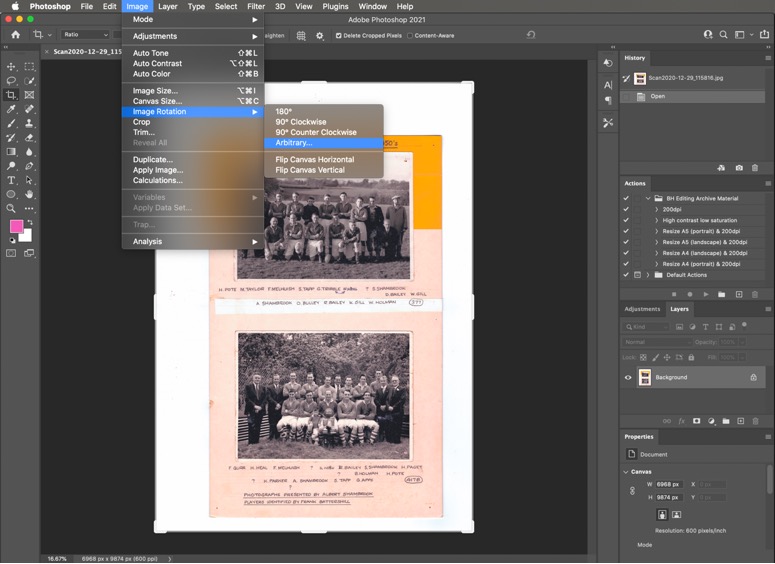
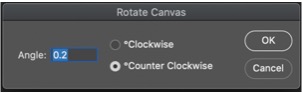
- If you need to rotate the image by a very small angle, select ‘Image’ > ‘Image Rotation’ > ‘Arbitrary…’ in the uppermost toolbar. Enter a small number and see if it perfects the straightness of the top or left edge of your image. If not, undo and try again!
- If the colours in your image are not true to the original, use the tools (e.g. ‘Hue/saturation’, ‘Brightness/contrast’) in ‘Adjustments’ in the right had toolbar to get as close as possible. Remember if you get it wrong, you can undo and try again!
- When you are happy with the way your image looks compared to the physical original, you are ready to save it. First of all, you need to make sure the image is a sensible ‘size’ both in terms of scale and quality. Reduce the resolution down to 200dpi using the Default Actions saved in the ‘Actions’ window.
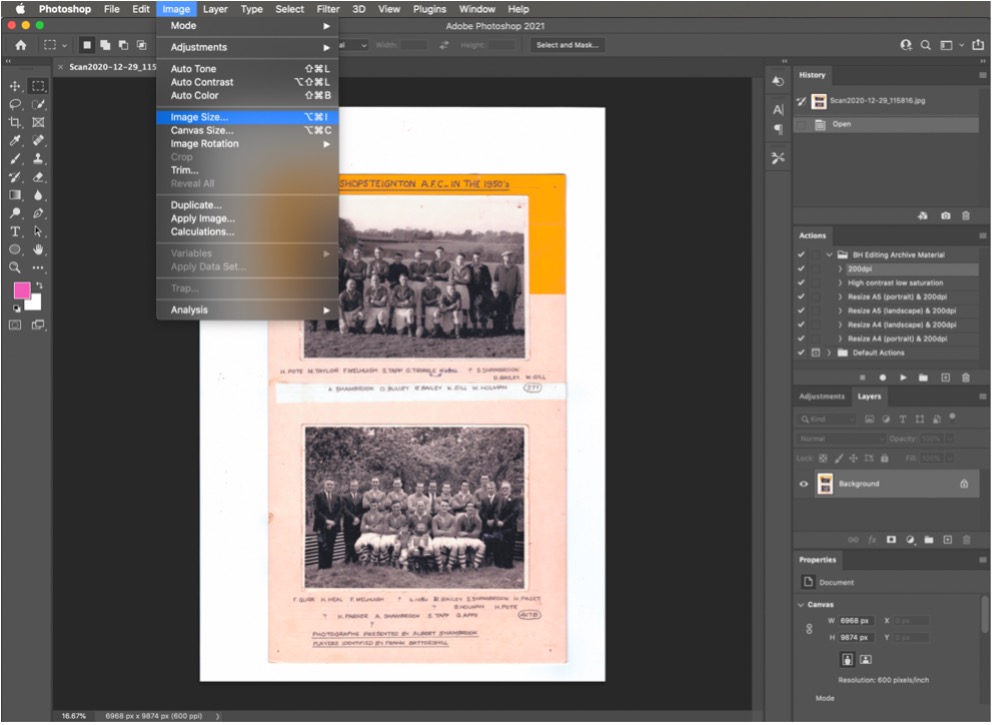
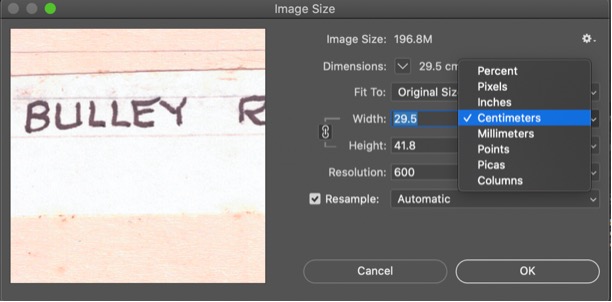
- Finally, after measuring the original item, change the Width or Height to be accurate to the original. You can change the size of the image by selecting ‘Image’ > ‘Image Size…’
- In the Image Size window, make sure the ‘Width’ and ‘Height’ sub-titles have the grey lines and link symbol connecting them. Select Centimetres as your unit of measurement from the drop-down and change either the width or height to be accurate to the physical original item.
3.3 Saving the image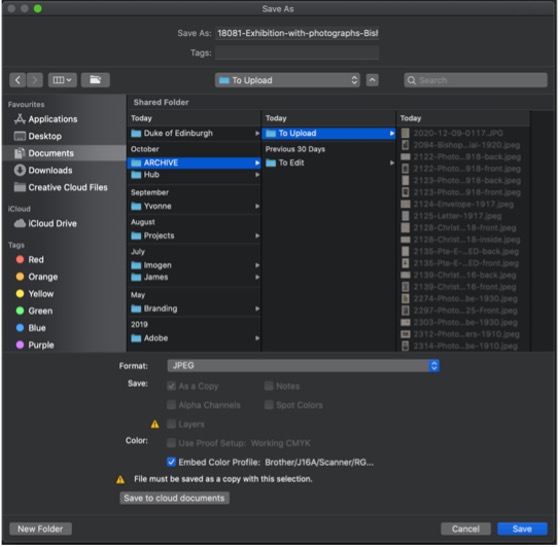
- Now you can navigate to ‘File’ > ‘Save As…’.
- First, make sure you are saving the file in the correct Folder: ‘ARCHIVE’ > ‘To Upload’.
- Use the ‘Format’ drop-down menu to find the right file format: ‘JPEG’.
- Next, use the File-naming Convention below to re-name the image.
3.3.1 File-naming Convention for Digital Surrogates
Different formats of analogue records/archive material may present challenges in the standardisation of naming their surrogates, but in general this will be a useful rule to stick to wherever possible:
[ID] [format] [subject] [year or circa year of creation] [side/face/page]
Things to remember:
- An image’s name is built from information about the original, analogue archive material and is the same essential information you will use when Cataloguing the item so think about how you will be filling in the catalogue form while you name your image files.
- Use spaces between words, as opposed to hyphens.
- Keep the ‘subject’ section to as few words as possible.
- The side/face/page section should be used when there is a view for more than one side, face or page of a record. Photographs of 3D objects should be treated similarly, try to use the naming convention as far as possible without adding lots of extra words/terms!
 Here’s an example:
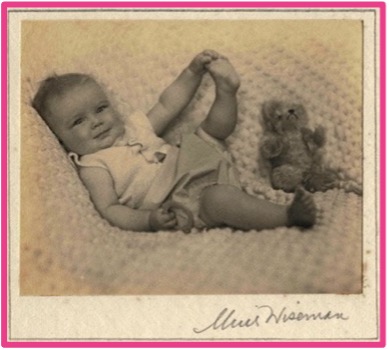
2303 Photograph infant Molly Coombe 1930 front
- Now you can click ‘Save’ and move on to uploading and cataloguing your images online!