
Upload: Things you need to know
This guide provides detailed instruction on the correct procedure for arranging and describing items in the Media Library so that they are accessible as archive-quality images via the Catalogue Search tool and as smaller images featured in history articles. This guide does not provide detailed instruction on how to use every aspect of the Media Library, on digitising archive material or otherwise processing archives. If you need any help with any aspect of the processes in this guide, speak to one of the Hub Team.
Upload: Things you need to know
Permissions & Provenance
Any archive material uploaded to the media library must to be catalogued first using the Catalogue Input form and the relevant Guides. Please see the Cataloguing Guide and other guides for more details.
Catalogued archive material will have been processed with the permission of the owner. Digitisation and publishing on the BH website require us to seek additional permission from the copyright owner. The appropriate permissions should be sought before cataloguing takes place. Before uploading anything to the media library, make sure you’ve had a look at the Accession information for the material you’re working with as there may be special conditions you need to meet or adhere to when working with the material. Take a look at the Access Policy and the Appraisal and Accessioning Guide for more information.
If we do not have permission to publish the material, we can still upload it to the BH website’s media library for private reference and research. See the Attachment Details section for more guidance.
File properties
Make sure the image is fully processed as per the Digitisation Guide before uploading it to the website.
High quality archive-copy digitisations of archive material don’t usually need to exceed 2MB in size. In fact, they probably don’t need to be as big as 1MB depending on the item’s actual real-life scale.
When you upload an image that is a version/digitisation of an item in the Item Catalogue, make sure that the image you want to appear in the Item Catalogue is the first image you upload to the Media Library.
For example, if you have a photograph with a short inscription on the back, you ought to digitise both sides and upload them both to the media library. Upload the image of the front of the photograph first so that it appears in the Item Catalogue.
Folder
There are 5 main folders in the Media Library on the BH website. These are:
- People
- Places
- Events
- Environment
- Research
These contain lots of sub-folders to make sure everything is organised, e.g.:
People > Organisations > Bishopsteignton AFC > 18005 Bishopsteignton AFC Scrapbook 1972
However, the list of existing folders is by no means exhaustive and sometimes an image seems like it could go into more than one folder. While this tidy folder system is not the best way to look for the items you want to see once they’re uploaded, it is the best way to store your uploaded images as part of ongoing and ever-expanding research projects.
Store all your uploads in one folder of the same name as your research project to which has been assigned an ID number range. For example, all the images relating to newly catalogued Bishopsteignton AFC material in the BH archive is stored in the folder named ‘Bishopsteignton Association Football Club’. You can also use the ID number range to help identify a run of uploads that relate to catalogued material but are not necessarily part of a specific research project, for example ‘22000-22999 Rowena’s Personal Archive’. Items can always be moved around later on if a more appropriate home is found for them.
If you need to make a new folder, simply click the ‘New Folder’ button at the top of the Media Library page. If you need to re-name your new folder, just double-click its name in the left side-bar, type in the new name and click the ‘Save’ button under the text box.
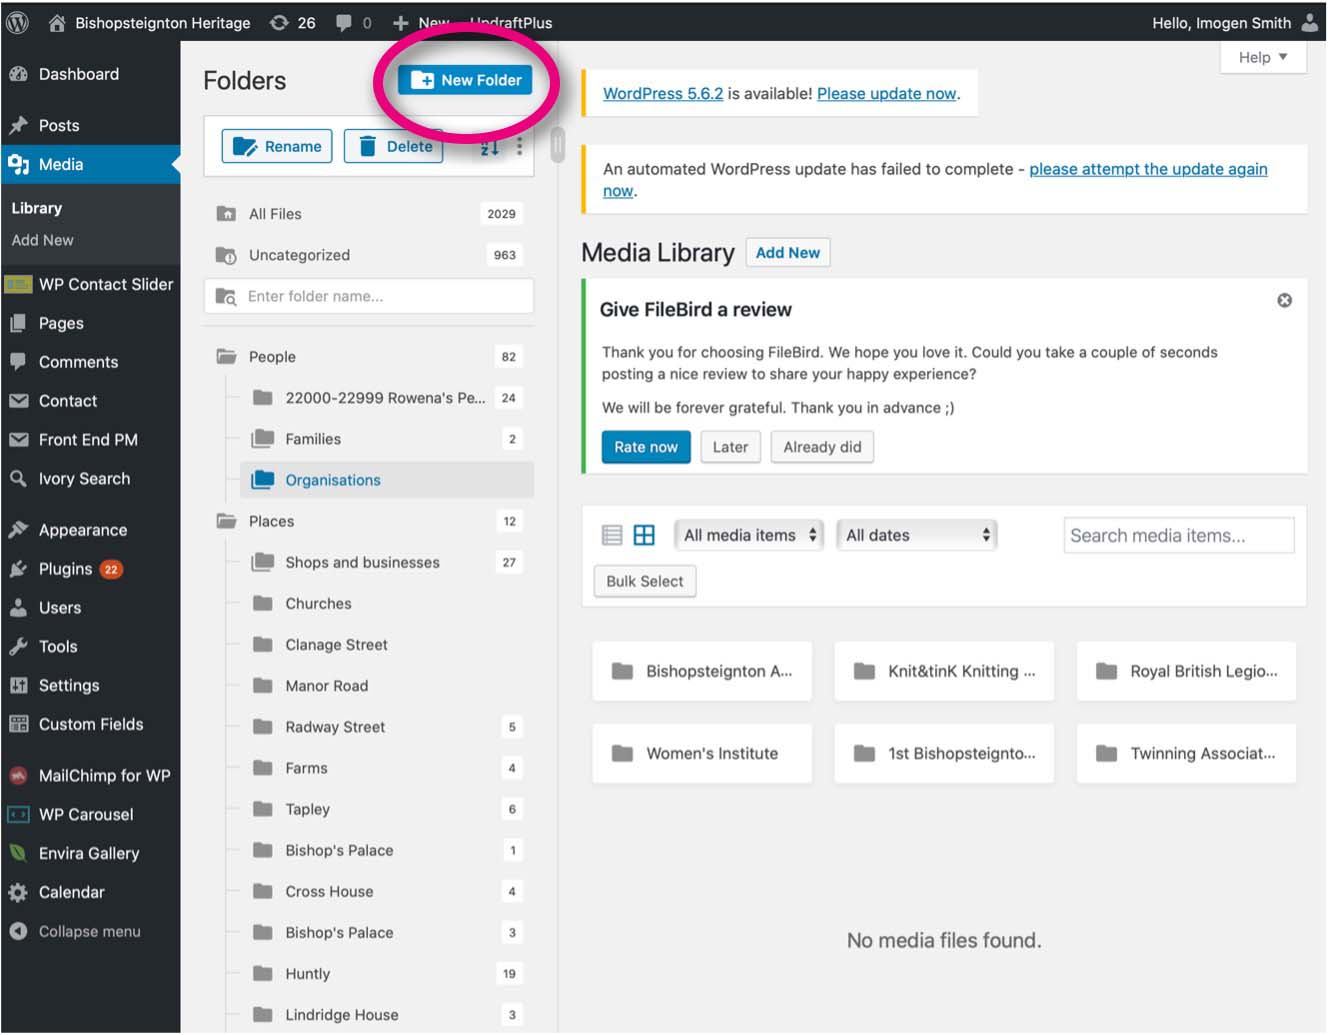
If you need to re-position your new folder under a category folder or sub-category folder, you can click and drag it up and down the list and drop it where it needs to go!
Upload: Method
When you’ve chosen or created an appropriate folder for your uploads, click ‘Add New’ at the top of the Media Library page:
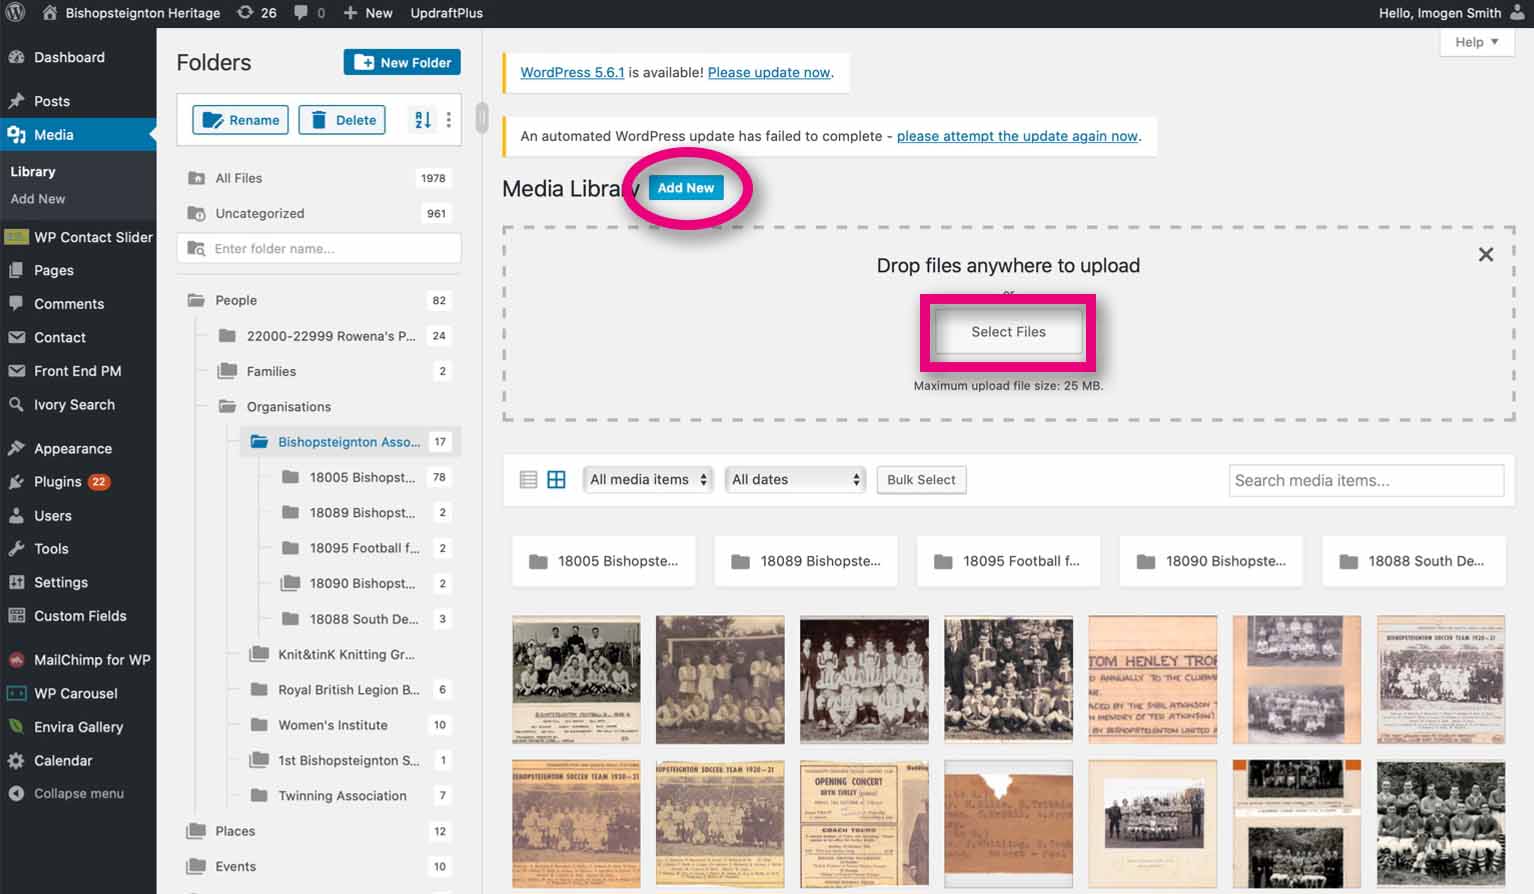
This will bring up the upload box, click ‘Select Files’ and use the documents navigator that pops up to choose what you want to upload. You may have a different maximum upload file size depending on your individual account permissions on the BH website. If you need to upload a larger file than the Media Library will allow, speak to a member of the Hub Team.
When you’ve uploaded your file, it will appear at the top left of the folder:

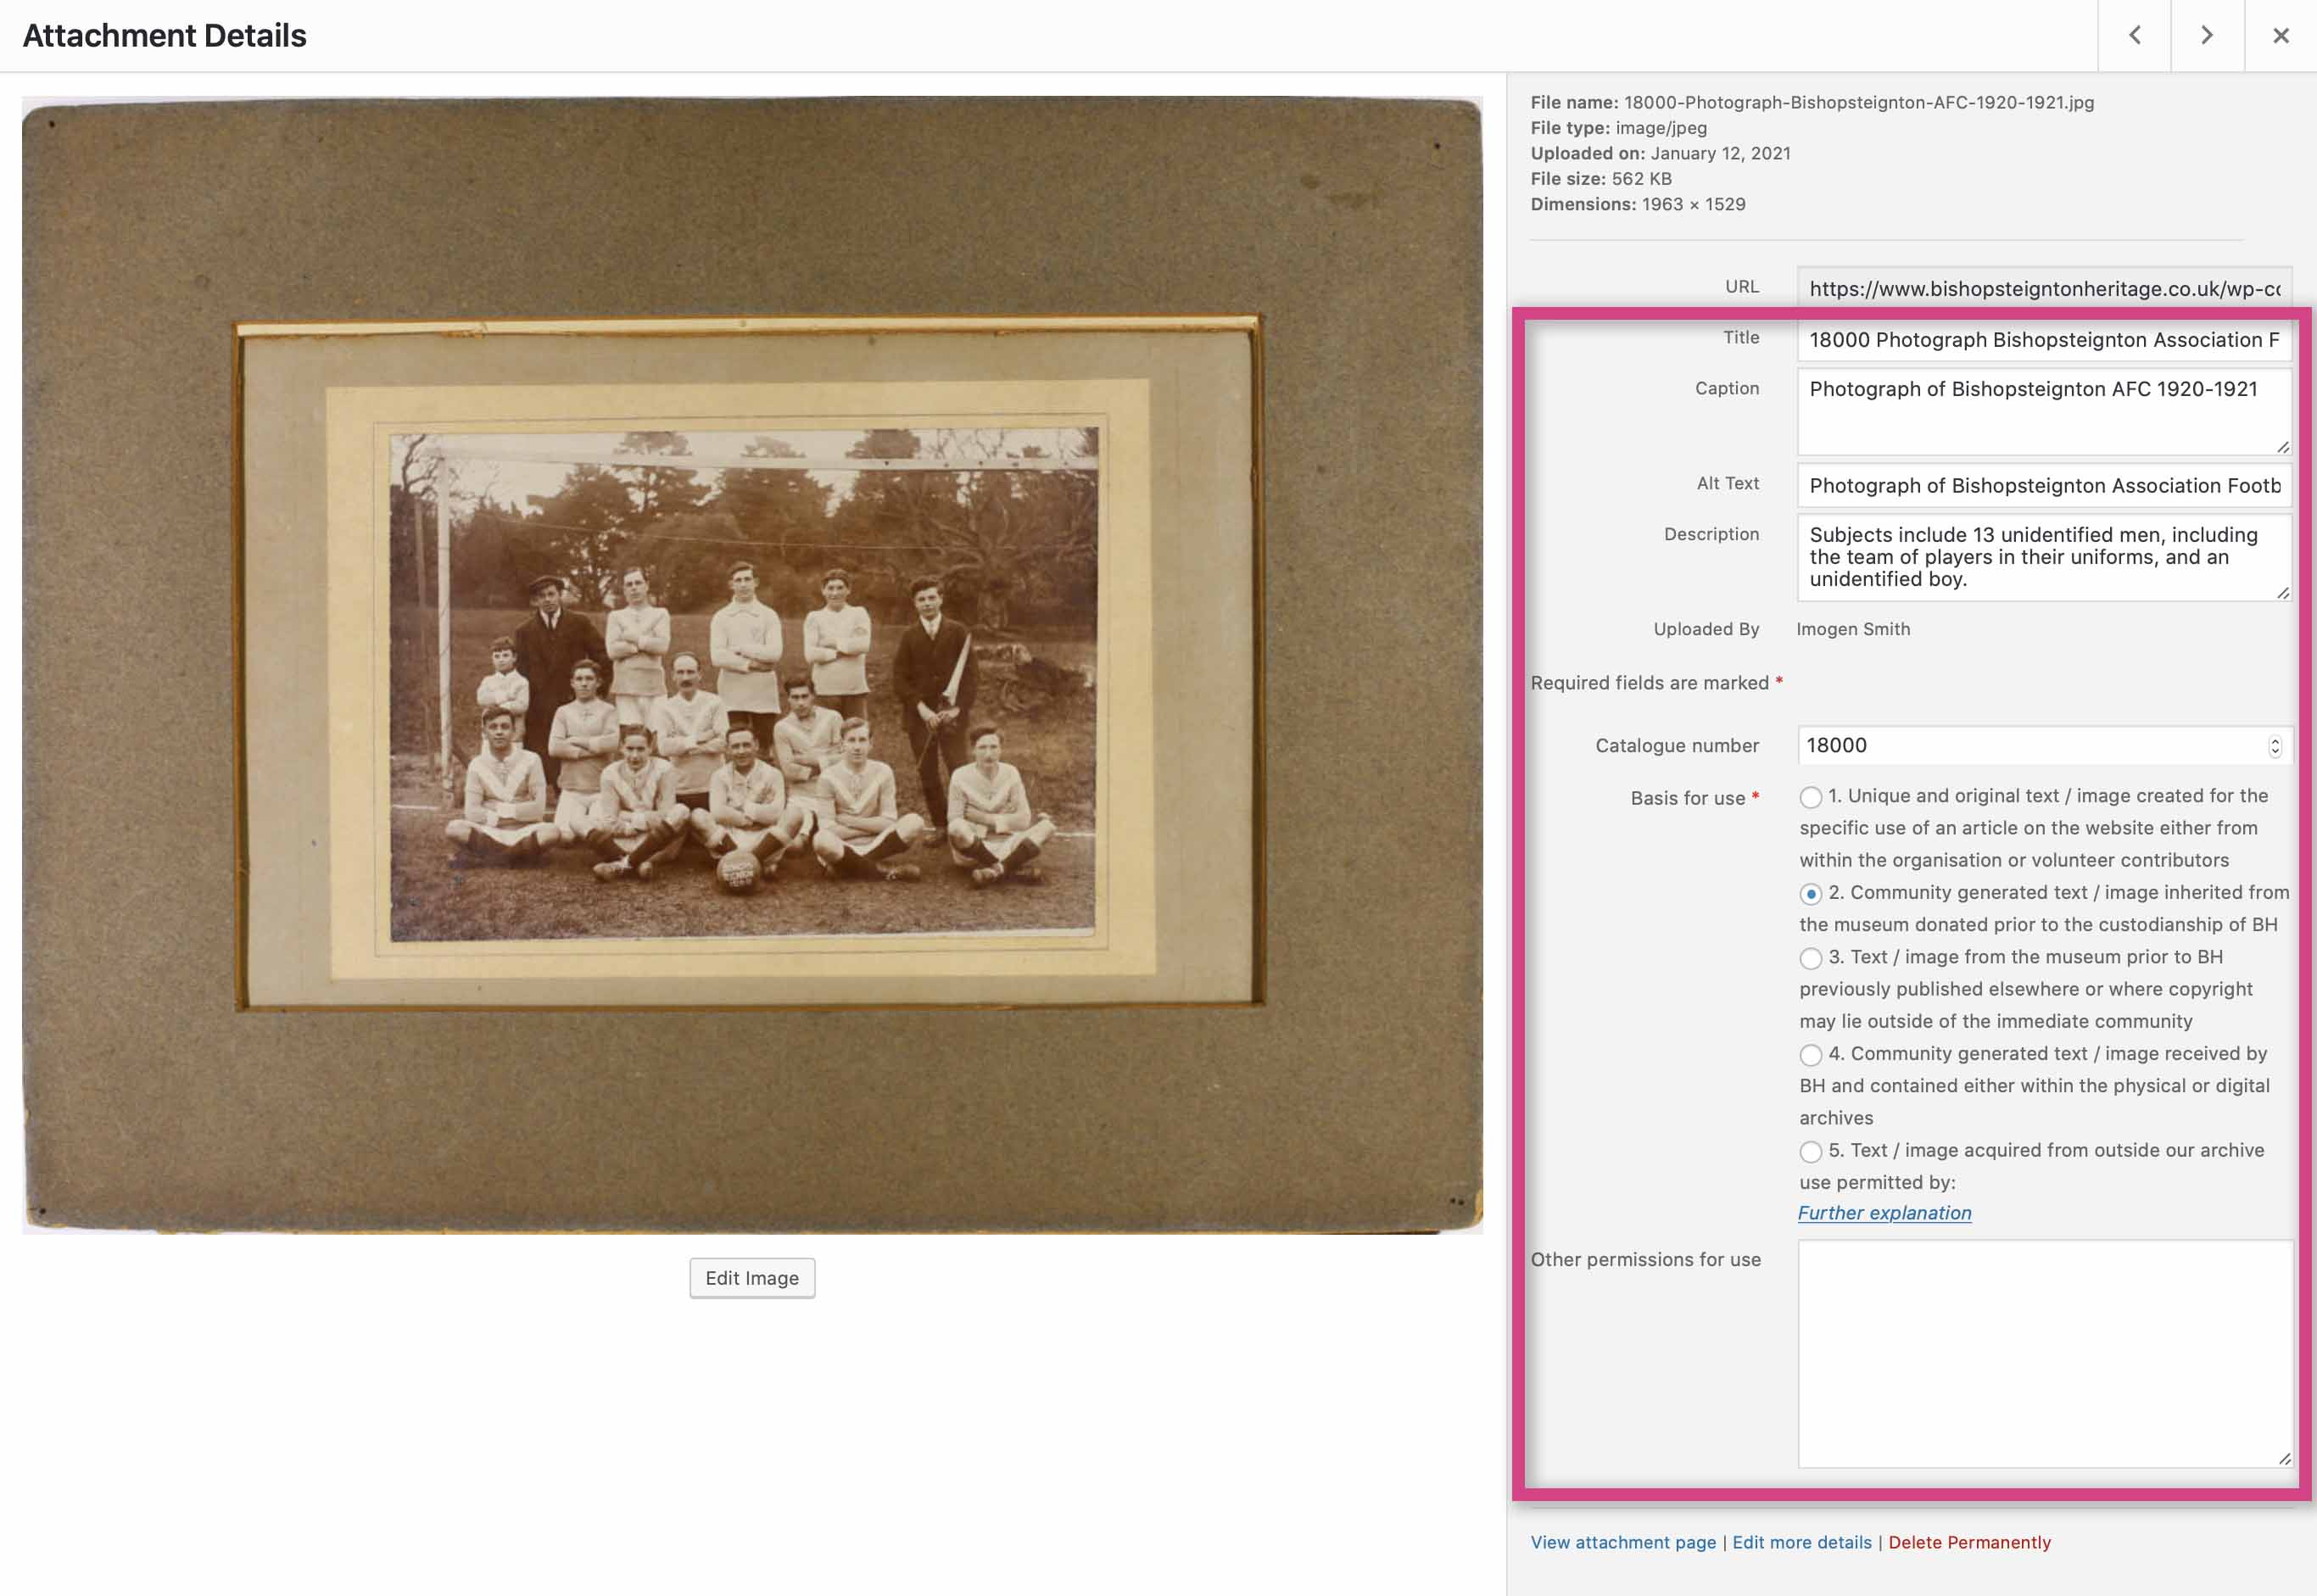
By clicking on your newly uploaded file, you can view and edit all the ‘Attachment Details’ so that it matches with, and is linked to, the relevant catalogue entry.
Attachment Details
These details make sure that digital surrogates can be found easily in the media library and are linked with their associated catalogue entry.
It’s important to remember that if you gain extra knowledge about an item and edit its catalogue entry, you will need to enter any new/changed information into the Attachment Details.
Title
Copy and paste the Item’s ‘Title’ from its associated catalogue entry. You can also but the Item’s ID number in here if its ‘Title’ is similar to another Item.
Caption
This is the text that will appear underneath the image if it is used in a ‘Post’ or ‘Page’ on the BH website. Either leave blank or copy and paste the same text as the ‘Title’.
Alternative Text
This is a really important field as it is the text that will be read out loud by special software designed for the blind to use computers effectively. Make sure you copy and paste the same text as the ‘Title’ in here as well.
Description
Copy and paste the Item’s ‘Description’ from its associated catalogue entry.
Catalogue ID Number
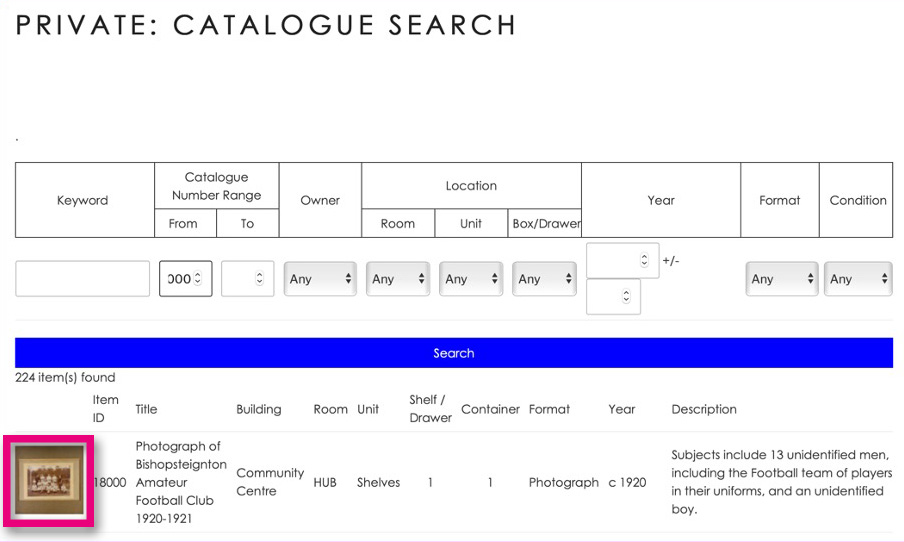
You need to link digitised archive material to catalogue entries. As mentioned above, the first image you upload and associate with a catalogue entry will be the image that appears next to an item in the catalogue search results. Make sure you fill in the ‘Catalogue number’ field in the Attachment Details with the correct number.
Basis for use
This is where we record what basis upon which we have decided to publish the image online. You will need to have read through and understood the Copyright Procedures document so that you can fill in this section with confidence. Tick the box you have decided is the right fit for the individual item, most collection items will fit into option numbers 2, 3 or 4.
If you are uploading an image that is not a digital surrogate for a collection item or a born-digital collection item, you will probably need to tick option number 1 or 5. If you tick 5, you will need to record the licence which gives BH permission to reproduce the image publicly on our website.
Uploading digitised Volumes
Preparations
After ensuring BH have acquired the correct permissions, digitised volumes (books, booklets, etc.) can be added to the media library for research and/or publishing. However, since each page will have been photographed or scanned individually, it is most useful to compile them into a PDF document. See the Digitisation Guide for detailed instructions on how to make the pages of a digitised Volume into a PDF.
In the Media Library, it is most useful to create a sub-folder for the volume and no other material. Name it with the Item’s ID number and ‘Title’. This means you can upload an image of the cover (or alternative illustrative page, e.g. inside front cover) to appear with a catalogue search, while keeping the project/theme media folder tidy and easy to navigate.
Upload
You can then upload the PDF document onto the Media Library in the same way as for individual images. Remember that the file size is likely to exceed the 2MB limit so speak to a member of the Hub Team about the best way to upload a larger document.
As mentioned in the previous section, the first image you upload to the Media Library will be the image that appears attached to the Item’s associated Catalogue entry. You can’t use a PDF document for this purpose so before the document, upload the digitised image of the volume’s cover (or alternative illustrative page, e.g. inside front cover).
Attachment Details
When you fill in the Attachment Details for the Volume’s ‘cover’ image, make sure you state in the ‘Title’ and ‘Alt Text’ fields that it is indeed an image of the cover, as opposed to being the entire Volume. You can leave the ‘Description’ field the same as the Catalogue entry as with normal individual images.
Appendix: What to do with original capture files
When you have completely finished the Digitisation and Upload process, you can delete the original RAW files (if captured with camera) or scans (if captured with scanner). HOWEVER, if you deem a particular piece of archive material to be especially important, unique, at risk due to age or if it contains lots of small unique detail (e.g. handwritten 18th century indenture), you should keep the original RAW file image.
If you have decided to keep an original capture image, save it in the same location as its counterpart which was uploaded to the website. Use the same naming convention as in the Digitisation Guide Section 3.3, adding this phrase between the ID number and first word: ‘ORIGINAL CAPTURE’
Here’s an example:
2303 ORIGINAL CAPTURE Photograph infant Molly Coombe 1930 front
Don’t upload original capture images unless they’re needed for a specific project/purpose.